No products in the cart.
Showing all 10 results
-
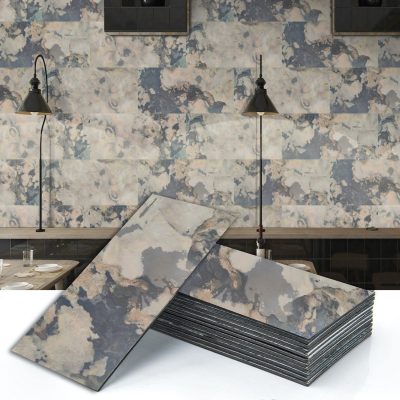 Autumnus Rustic 2 ft X 1 ft Peel & Stick Stone VeneCA$12.99 – CA$170.00 Select Option This product has multiple variants. The options may be chosen on the product page
 -
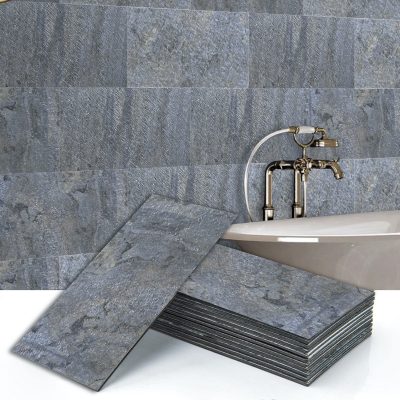
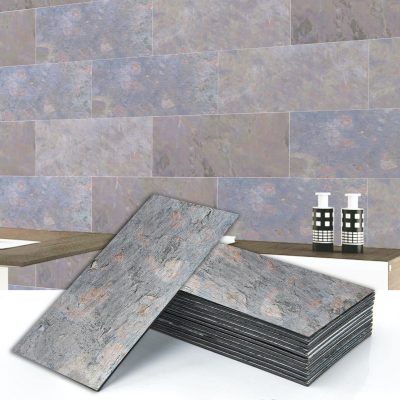
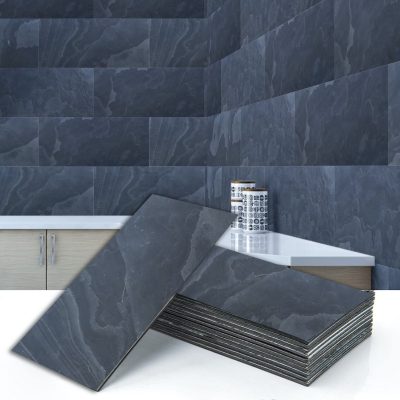
Black Steel 2 ft X 1 ft Peel & Stick Stone Veneer WCA$12.99 – CA$170.00 Select Option This product has multiple variants. The options may be chosen on the product page
-
 Dazzle Green 2 ft X 1 ft Peel & Stick Stone VeneerCA$12.99 – CA$170.00 Select Option This product has multiple variants. The options may be chosen on the product page
 -
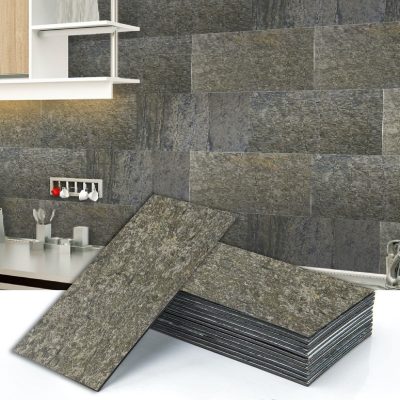
 Deccan Gold 2 ft X 1 ft Peel & Stick Stone Veneer WCA$12.99 – CA$170.00 Select Option This product has multiple variants. The options may be chosen on the product page
 -
 Golden Patina 2 ft X 1 ft Peel & Stick Stone VeneerCA$12.99 – CA$170.00 Select Option This product has multiple variants. The options may be chosen on the product page
 -
 Indian Glory 2 ft X 1 ft Peel & Stick Stone VeneerCA$12.99 – CA$170.00 Select Option This product has multiple variants. The options may be chosen on the product page
 -
 Ivory Autumnus 2 ft X 1 ft Peel & Stick Stone VeneeCA$12.99 – CA$170.00 Select Option This product has multiple variants. The options may be chosen on the product page
 -
 Rustic Zinc 2 ft X 1 ft Peel & Stick Stone Veneer WCA$12.99 – CA$170.00 Select Option This product has multiple variants. The options may be chosen on the product page
 -
 Spring Autumnus 2 ft X 1 ft Peel & Stick Stone VeneCA$12.99 – CA$170.00 Select Option This product has multiple variants. The options may be chosen on the product page
 -
 Woodland Fire 2 ft X 1 ft Peel & Stick Stone VeneerCA$12.99 – CA$170.00 Select Option This product has multiple variants. The options may be chosen on the product page
What Are Thin Stone Veneer Wall Panels?
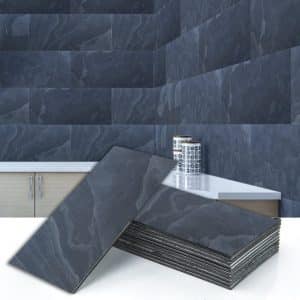
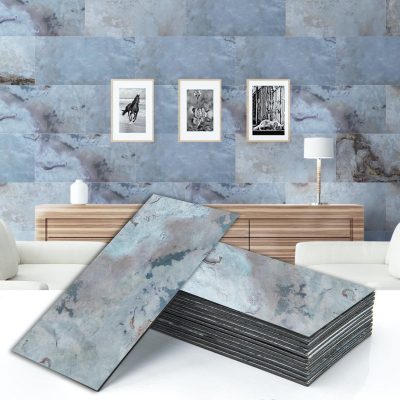
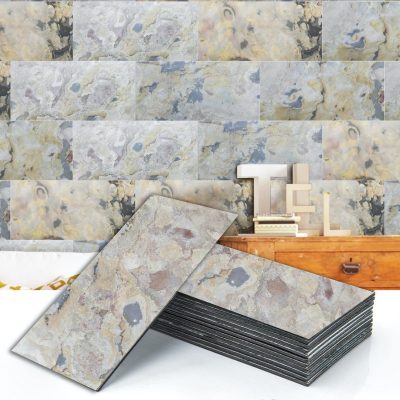
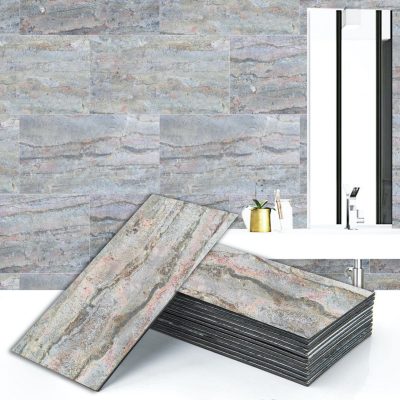
Thin stone veneer wall panels are crafted from genuine, natural stone sliced into thin layers and bonded to a fiberglass backing. Each panel replicates the appearance and texture of solid stone slabs but is significantly lighter and easier to work with. Common stone types used include slate, sandstone, and limestone, offering a wide range of tones and textures. Thanks to the lightweight construction, these panels suit a variety of design applications, from rustic outdoor facades to modern indoor feature walls.
One of the key advantages of thin stone veneer panels is the ability to provide an authentic stone appearance while simplifying installation. The luxurious aesthetic of full stone can be achieved without the need for reinforced support structures, due to the reduced weight of each panel. This lightweight design simplifies handling and lowers installation costs, making the panels a practical choice for both renovations and new construction.
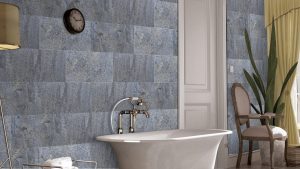
Available in a range of colors and textures, stone veneer panels complement traditional, transitional, or contemporary interiors. Common applications include feature walls, fireplace surrounds, and kitchen backsplashes, offering an easy way to elevate interior design.
How to Install and Maintain Self-Adhesive Stone Veneer Panels
Step 1: Prepare the Surface and Plan Your Layout
Clean the wall to remove dust and debris, ensuring it’s dry and smooth. Measure the area, mark level guidelines, and plan your panel layout for even and symmetrical placement.
Step 2: Cut, Peel, and Stick
Trim panels as needed using a utility knife for corners or outlets. Peel off the adhesive backing and press the panel firmly onto the wall, starting from the bottom. Smooth out air bubbles and align each panel tightly as you go.
Step 3: Final Touches and Maintenance
Ensure all panels are securely attached and touch up any rough edges if needed. Maintain your panels with regular dusting and occasional wiping using a damp cloth. Avoid harsh chemicals to preserve the stone’s natural finish.
Whether you’re planning a full home renovation or simply upgrading a single room, Dundee Deco offers a premium selection of thin stone veneer wall panels that combine beauty, quality, and ease of use. With a wide variety of colors and textures, our panels help you achieve the high-end look of natural stone—without the heavy lifting or professional installation. Explore our collection today and let Dundee Deco be your trusted partner in bringing timeless style and texture to your walls.

Frequently Asked Questions
How do you install a Veneer Wall Panel?
Our peel-and-stick veneer panels make installation feel like a breeze, turning it into a DIY project since no special tools or grouting are needed. Here are the steps to successfully apply our veneer panels to any surface:
- Clean the surface where the panel will be used. Ensure it is free of contaminants such as dust and grease.
- Measure the area and mark the positions of the panels.
- Cut the panels to size using a utility knife or a saw.
- Peel off the backing to reveal the adhesive. Carefully align the panel to your marked positions.
- Press firmly across the surface to ensure strong adhesion.
- Remove any air bubbles using a roller or your hands.
Can these panels be used in bathrooms or kitchens?
Yes, our veneer panels are an excellent choice for any bathroom, kitchen or layout due to their water-resistant properties. They can withstand humidity and varying temperatures, making them highly versatile.
However, we still recommend applying a sealant in frequently wet areas. This extra step helps protect the veneer panels against prolonged moisture exposure and extends their lifespan, ensuring your walls remain stylish and durable.
How do you cut and fit the panels around switches, outlets, and other obstacles?
Cutting and fitting our Veneer Wall Panel selections around switches, outlets, and other obstacles is straightforward. Here’s how to do it:
- Measure the area around the obstacle carefully.
- Mark these measurements on the panel with a pencil.
- Use a utility knife or a fine-toothed saw to cut the panel according to your markings.
- Dry-fit the panel to ensure it fits properly around the obstacle.
- Remove the adhesive backing and apply it to the wall.
How durable are the panels, and can they be removed?
Each item in our Veneer Wall Panel collection is engineered for durability and longevity, making it ideal for high-traffic areas due to its resistance to impacts and scratches. Its robust panels can adhere to surfaces for many years.
If you need to remove these panels, follow these steps:
- Gently heat the panel with a hairdryer to soften the adhesive.
- Carefully peel the panel off the wall.
It's important to note that removal might damage the underlying surface or the panel itself, so proceed with caution. This method ensures that you can update your space as needed while maintaining the integrity of your walls.